
Haruno 快速上手
从安装应用到完成第一个月的结账:登录、打开复核工作区、设置一家公司,并阅读其结账得出的发现事项。
所需条件
开始之前,请确认您已准备好以下各项。
- 一台搭载 Apple 芯片、运行 macOS 15 或更高版本的 Mac。
- 一个 Haruno 账户。
- 您的复核工作区。订阅后,我们会与您一起设置复核工作区。
- 一家公司的工作簿:其 QuickBooks 报表导出文件或 Excel 财务资料包、对账底稿,以及预算(如有)。
- 用于登录以及与 Haruno 对话的互联网连接。结账脚本本身不需要联网。
Haruno 将每家公司称为 client(客户);文件夹名称、命令和仪表板中用的都是这个词。
目前,复核在 macOS 应用中运行。如需与不使用 Haruno 的人分享仪表板或报告,请将其导出为 PDF。
安装并启动
下载 Mac 版 Haruno,将其拖入“应用程序”文件夹并打开。完整步骤(包括 macOS 提示应用来自身份不明的开发者时该怎么做)请参阅安装页面。
在电脑上登录
在第一次对话之前,请先登录您的 Haruno 账户。全新安装后,Haruno 会先请您选择一个项目文件夹(见下一节),选择之后,账户菜单才会出现在侧边栏中。为保护您的密码安全,应用从不直接索要密码:它会打开您的浏览器,由您在浏览器中确认此次连接。您批准后,桌面应用即与您的账户关联。账户支持使用 Google 登录,也支持使用电子邮件和密码登录。
- 在侧边栏底部的账户菜单中选择“Sign In…”(登录),或按 ⌘, 打开“Settings”(设置),在“General”(通用)中点击“Sign in to Haruno”(登录 Haruno)。浏览器会打开 Haruno 网站。
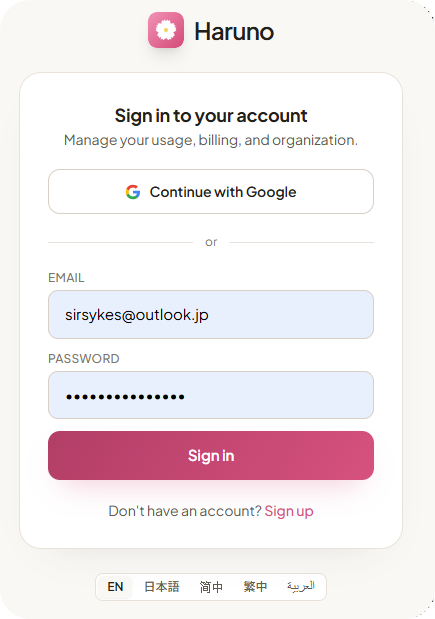
- 确认浏览器中显示的设备名称与您电脑的名称一致。
- 点击“授权”,将这台电脑关联到您的账户。
- 返回应用,您已完成登录。
您可以在多台电脑上登录,并可随时在 Haruno 网站的“账户”页面管理或吊销已关联的电脑。
打开您的复核工作区
您的复核都存放在一个文件夹中,即复核工作区:包含 .haruno 文件夹的那个文件夹。在 Haruno 中打开它后,Haruno 会从中读取复核所需的一切。
- 首次启动时,Haruno 会显示“Choose a project folder”(选择项目文件夹)。点击“Choose Project Folder…”(选择项目文件夹)按钮。
- 选择您的复核工作区,也就是包含 .haruno 的文件夹。请准确选中这个文件夹本身,不要选它的上一级文件夹,也不要选它里面的文件夹。
- 之后如需切换文件夹,请选择“File ▸ Open Folder…”(文件 ▸ 打开文件夹),或按 ⌘O。
Haruno 从您打开的文件夹读取复核的设置,不会去查看它周围的文件夹,所以选择必须准确。工作区是自包含的:之后您可以重命名或移动它,不会丢失任何内容,包括已经完成结账的月份。
工作区里有什么
一个正在使用的工作区如下所示:
.haruno/      复核本身:每家公司的映射配置(spec)和结账脚本
workbooks/    各公司提交的资料,每家公司一个文件夹
ledger/       结账构建的标准化账簿,以及每份源工作簿的副本
reports/      按公司存放:报表包、对账底稿、投资者报告、调整记录
dashboards/   投资组合仪表板
结账读取和写入的所有内容都保留在这个文件夹中。
设置您的第一家公司
将该公司的工作簿放入工作区内的 workbooks/<client>/:月度财务资料包或其普通报表导出文件、对账底稿,以及预算(如有)。如果公司的经常性收入记录在计费系统或 CRM 系统中,可以将相应的导出文件以 CSV 格式加入。完整清单请参阅“公司需要提交什么”一节。
如果您想获得同样的成果,又不想在对话中发送客户数据,可以自行运行结账命令(见“自行运行”一节),只在不涉及客户数据的环节使用助手。详情请参阅数据处理与安全。
然后用您自己的话,让 Haruno 设置这家公司:
Acme 刚签约,他们的文件在 workbooks 里,帮他们完成初始设置。Haruno 读取这些工作簿并起草一份映射配置(spec):哪些科目编号归入哪个报表项目,每个小计如何构成,以及您将哪些项目与正常余额方向相反列示。如果提供的是财务资料包,其中几乎所有内容都直接取自公司自己的工作簿,因为报表本身就写明了其中的计算关系,所以草稿并非猜测。如果只有普通报表导出文件,则还没有现成的科目映射可读:草稿会根据每份导出文件自身的分节推断科目映射,并保留会计平台中的项目名称;把这些名称改成您列报时使用的名称,是下方清单中的主要事项。
阅读 REVIEW 清单
Haruno 无法从文件中读出的,是需要判断的事项。这些事项会以草稿顶部的 # REVIEW: 清单形式列出,例如:
- 对于普通报表导出文件:报表项目名称。在您给出列报时使用的名称之前,草稿沿用会计平台中的名称。
- 多大的金额才算重要(重要性水平)。
- 哪些对账缺失属于预期情况。清单会列出对账底稿中没有明细表的科目。
- 公司的资本化政策:资本化门槛、折旧方法和使用寿命。
- 报告货币:当某份导出文件声明的货币不是美元,或各工作簿之间不一致时。每家公司只有一种货币,数字从不换算。
- 科目编号如何分类:哪个首位数字代表资产、负债、权益、收入或费用。
- 公司名称,取自其自身文件(财务资料包的封面页,或导出文件顶部的标题区)。
请阅读这份清单。这就是科目映射对话,每家公司只进行一次。凡是结账需要初始值的地方,草稿都会写入一个,并在清单中注明:重要性水平的初始值是明确标注的默认值 $1,000(以美元计,即使报表以千元为单位列报也是如此);科目分类采用常见的首位数字惯例;折旧方法为年限平均法(直线法),这是结账唯一会计算的折旧方法。请确认或修改这些值。资本化门槛和使用寿命从不在草稿中预填:在您明确给出之前,不会对照任何门槛报告,固定资产明细表也只与总账进行比较。
用平常的话回答即可,例如:
重要性水平是 $1,000,现金在 QuickBooks 里对账。Haruno 会把每个回答记入映射配置,并向您准确展示改动了什么。如果某个回答让某些科目免于某项检查,例如现金在 QuickBooks 中对账而不在对账底稿中,这就是一项豁免。一旦该公司完成过一个月的结账,Haruno 就会列出每项豁免所涵盖的科目。在此之前没有可供匹配的对象,因此首次结账会把未涵盖任何科目的豁免报告为 unused_exemption 发现事项。Haruno 不会编辑您的电子表格。批准映射配置后,结账即开始运行。
分步说明请参阅“接入一家公司”一节。始终由您决定的事项,请参阅“哪些事项绝不替您决定”一节。
您的第一次结账
您批准映射配置后,首次结账随即运行。它读取每一份工作簿,应用已批准的映射配置,运行完整性检查,生成该公司的报告并刷新仪表板。它会报告发现事项、所有需要由人决定的事项,以及它写入的文件。在任何内容分发出去之前,Haruno 会先向您逐一说明这些发现事项。
发现事项优先
完整性检查在生成任何报告之前运行,它们才是重点:某个科目有余额,却没有任何报表项目认领它;某张明细表所列的总账数与账簿核对不符;手工录入的差额声称核对一致,明细却并不支持。发现事项不会中止结账。它是您原本要到第三周才会发现的事情。
每个发现事项都有严重程度:高、中或低。当某个月没有严重程度为高或中的发现事项时,该月即为“clean”(无高、中严重程度发现事项)。每项检查查找什么,请参阅发现事项与检查项。部分检查使用的阈值是基于一家公司的账目校准的,请将其视为起点。
之后的每个月
把新月份的工作簿放进该公司的文件夹,然后说:
帮 Acme 做本月结账,新的工作簿已经放进来了。运行的是同样的结账,不再需要科目映射对话:科目映射已经是经过批准的决定。如果您对其中某项改变了主意,直接说出来即可,例如“1450 Deposits Receivable 应归入 Other assets”。Haruno 会把这项更改以映射配置中几行可供复核的 YAML 的形式提出,而不是编辑您的电子表格。
您会得到什么
| 产出 | 说明 |
|---|---|
| 报表包 | 按该公司自己的版式列报的报表。 |
| 对账底稿 | 重新计算的每张明细表,并标明其中的例外。 |
| 投资者报告 | 面向该公司出资人的公司数字。其中不含发现事项、科目映射表和对账状态;预算与实际对比只有在该公司的映射配置指定时才会出现。 |
| 调整记录 | CSV 文件 reports/<client>/adjustments.csv:每次重述已锁定月份时,每个数字记一行。只有表头的文件表示没有发生过重述。 |
| 投资组合仪表板 | 所有公司汇集在一个视图中。 |
当某家公司的投资者要求了解最新情况时,请将投资者报告导出为 PDF 后发送,而不是发送仪表板:仪表板包含所有公司和所有发现事项。
该月已锁定
结账会锁定它所报出的月份。此后,任何会改变已锁定月份中某个数字的导入都会被拒绝,直到有人重新开启该月份并说明原因;这个原因会与因此得以更改的数字一并保存。更改已批准的科目映射同样适用,因为它会改变已锁定月份中的数字。
锁定不等于对账目下了定论。如果某个月结账时仍有严重程度为高或中的发现事项未解决,该月会被记录为“reported with exception”(附例外事项报出)。偿债能力迹象不计入其中:它们描述的是公司本身,而不是记账工作。只有当每个已锁定月份结账时都没有未解决的事项,公司才是“fully reconciled”(已全部核对一致)。
各份报告与锁定的详细说明,请参阅报告与结账锁定。如需不借助助手运行结账,请参阅“自行运行”一节;这只需要标准的 Python 3,无需任何其他依赖。
延伸阅读
您已经完成了一个月的结账。以下页面会深入介绍您刚才完成的每个环节。
复核流程——接入公司、科目映射对话、对某月结账,以及结账拒绝导入时该怎么做。
发现事项与检查项——每一项检查、其严重程度的含义,以及如何解决发现事项。
投资组合仪表板——如何解读每个面板,以及适用于整个仪表板的解读规则。
数据处理与安全——结账在您的 Mac 上保留什么、对话会发送什么,以及我们保留什么。