
Permissions
How Haruno uses permissions to access your apps and data.
Choose your level of control
Haruno starts in Operations Manager mode, a simpler experience that uses Haruno's recommended defaults. You can still connect apps, work with files, and respond when Haruno needs your approval.
Operations Manager mode is the default role. It keeps the Settings experience focused on everyday work and does not show advanced permission modes or per-action connector rules.
When Operations Manager mode is selected, the Advanced tab is hidden in Settings.

AI Engineer mode lets you see and customize technical controls, including permission modes, per-action connector rules, custom MCP servers, and detailed activity.
You can also switch between Default, Accept Edits, Plan, Automatic, and Bypass permission modes.
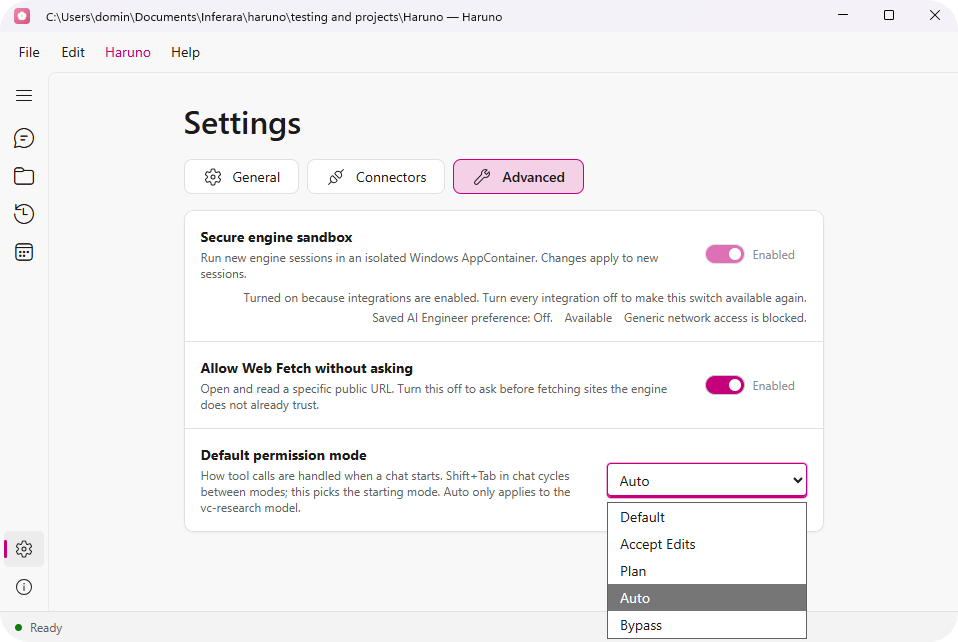
For more details, see the Connector action rules (AI Engineer) section.
Why permissions matter
Haruno can only work with the apps and files you give it access to. Permissions let you control exactly what Haruno can see and do. You grant each permission deliberately, and you can review or remove it at any time.
What Haruno can access
The level of access depends on the connector and what you approve.
- Files and cloud storage — read and write the folders you select.
- Collaboration tools — read information and draft updates according to your configured policy.
- Email — draft messages and act according to your configured policy.
- Productivity tools — create or update documents, spreadsheets, and pages in connected workspaces.
How to grant permissions
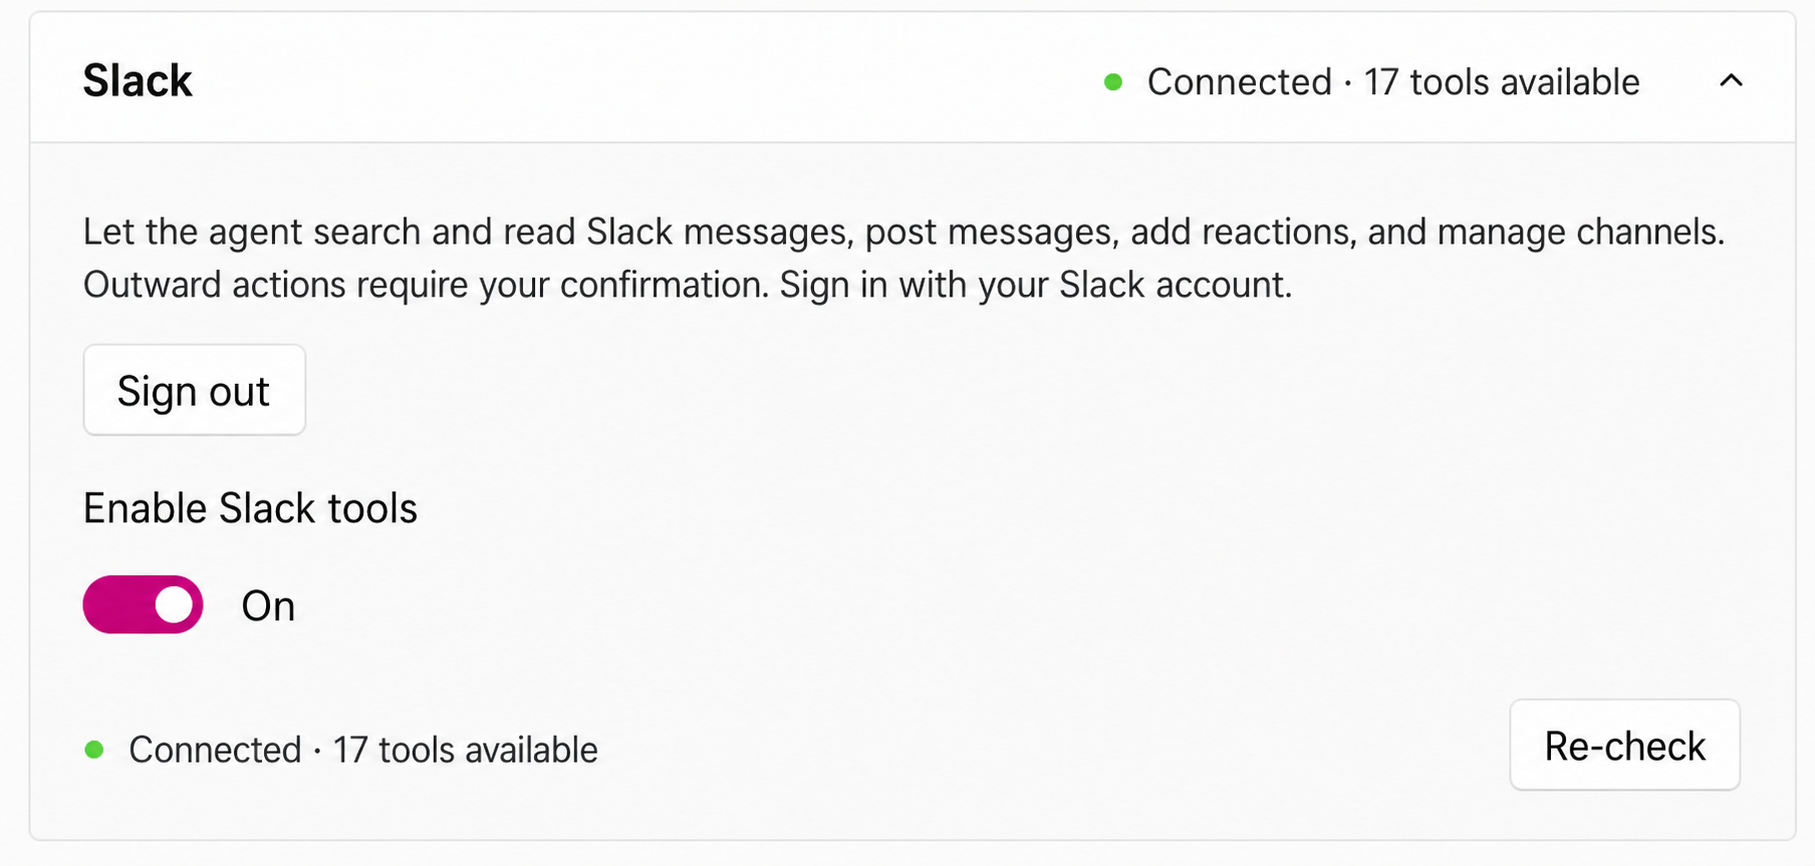
- Open Haruno and go to Settings > Connectors.
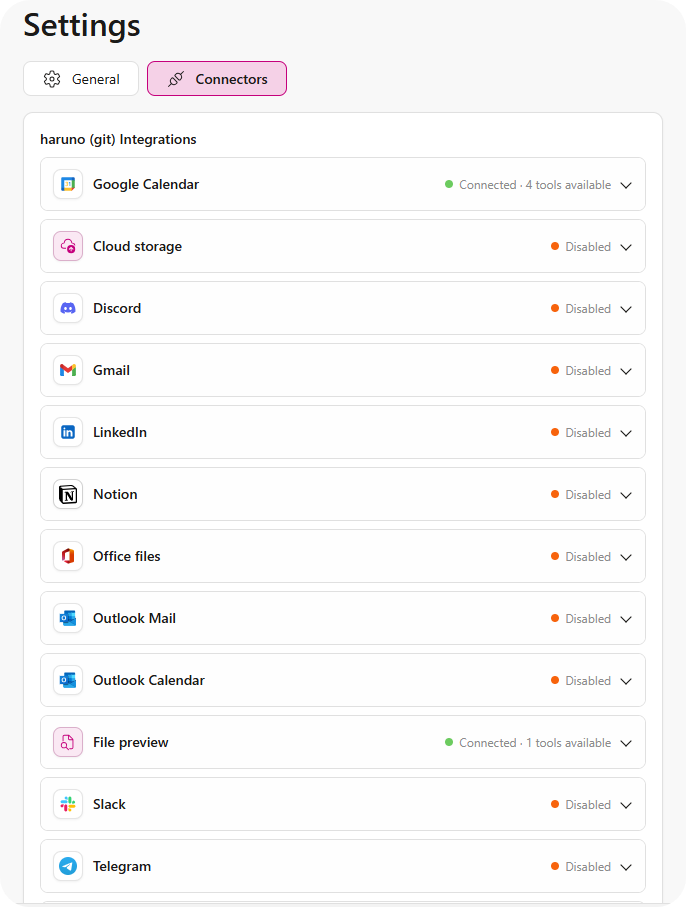
- Choose the app you want to connect.
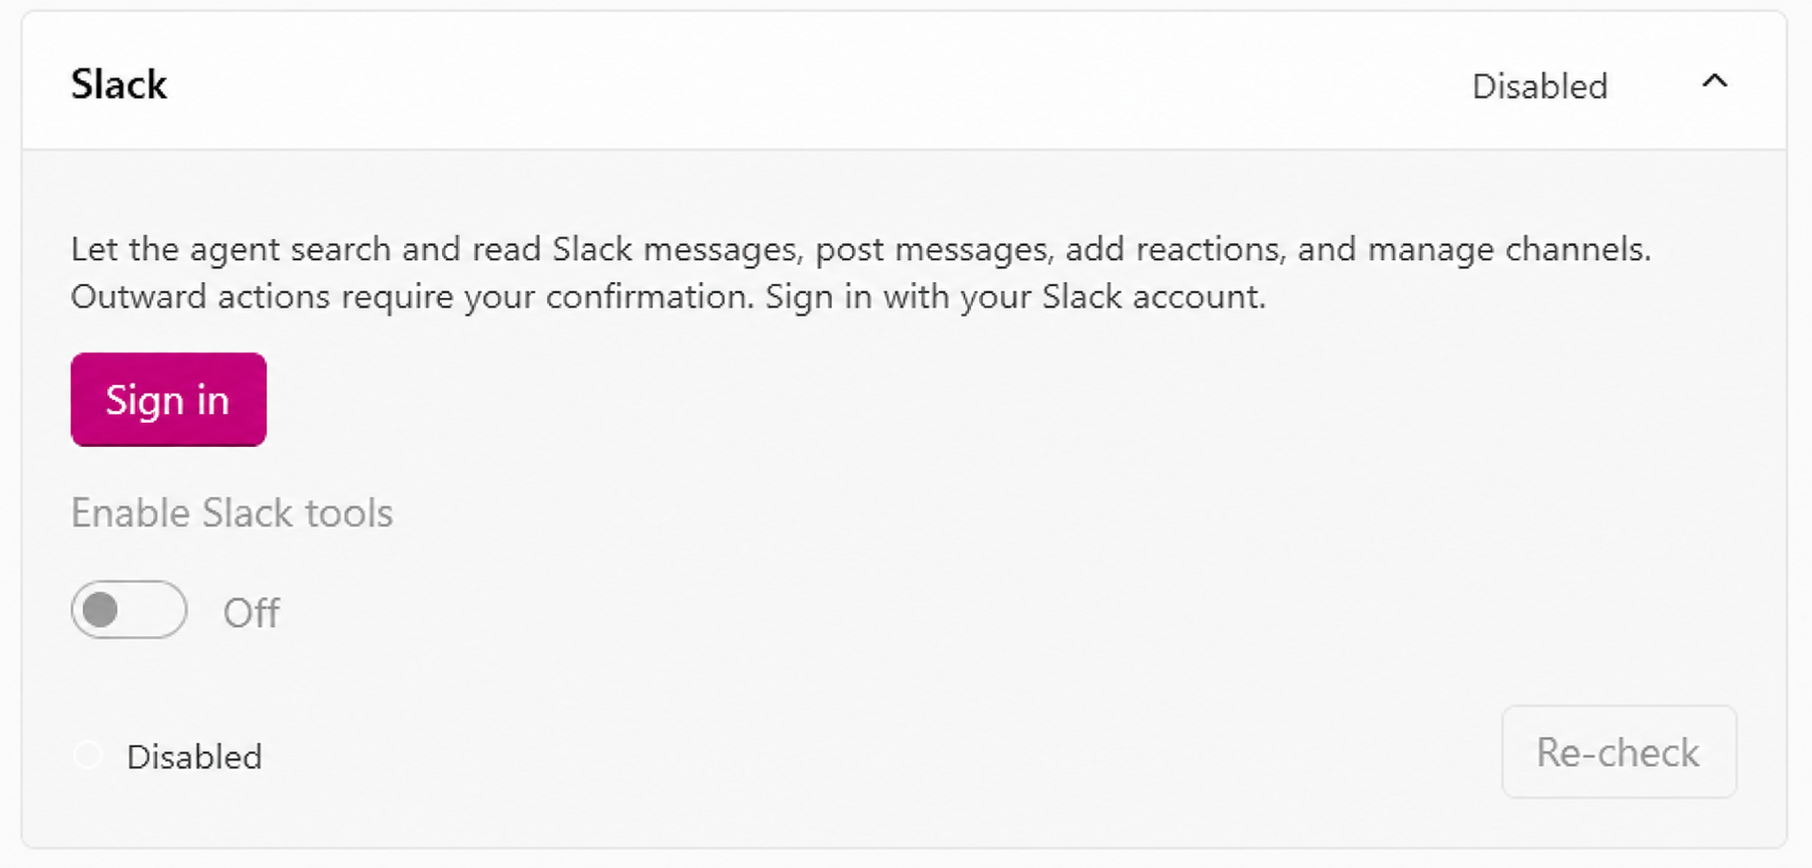
- Sign in with your existing account for that app.
- Review the permissions Haruno is requesting and confirm.
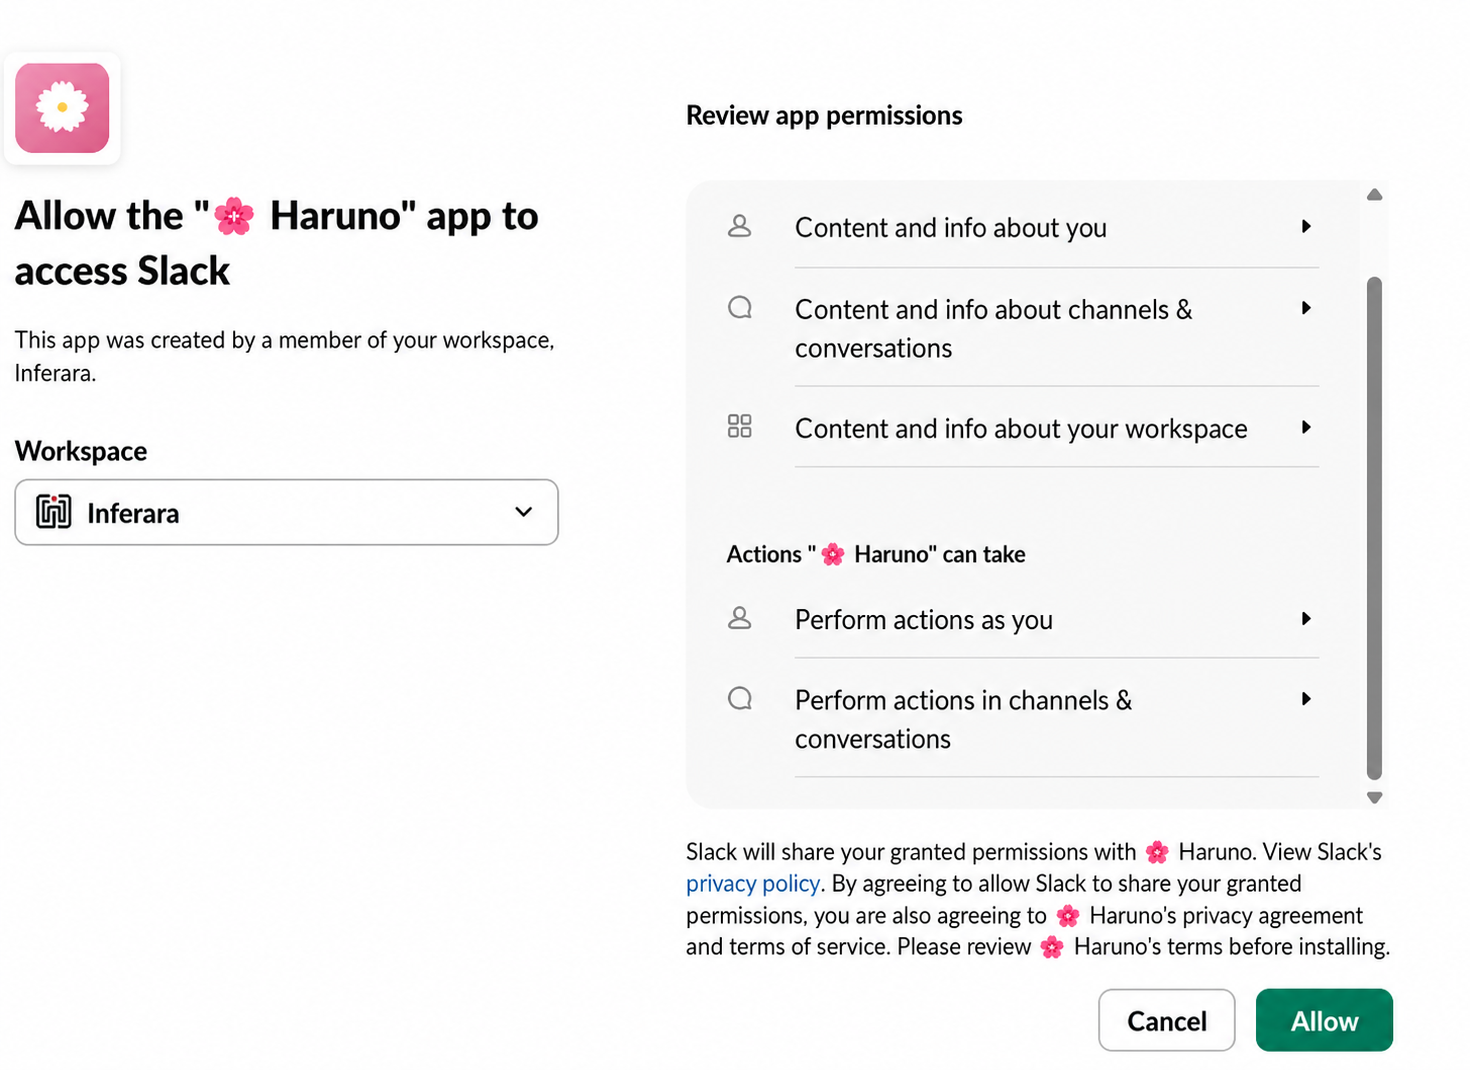
- Start using the connector in your tasks.
Approving actions as Haruno works
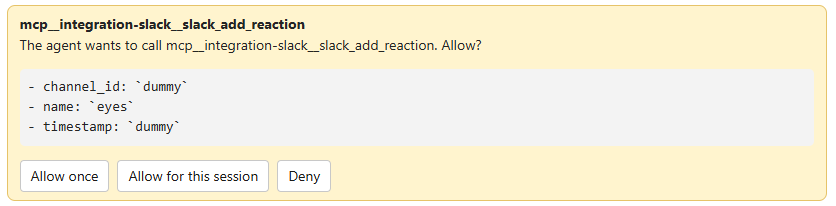
When Haruno needs your consent for an action under the active policy, it stops and shows what it wants to do. The request explains the action before it runs.
- Allow once — approve this single action. Haruno asks again the next time a matching action needs approval.
- Allow for this session — approve matching actions for the current chat session. Use this for a run of similar actions you have already checked.
- Deny — refuse the action. Haruno continues with the work it can complete and explains what it could not do.
Connector action rules (AI Engineer)
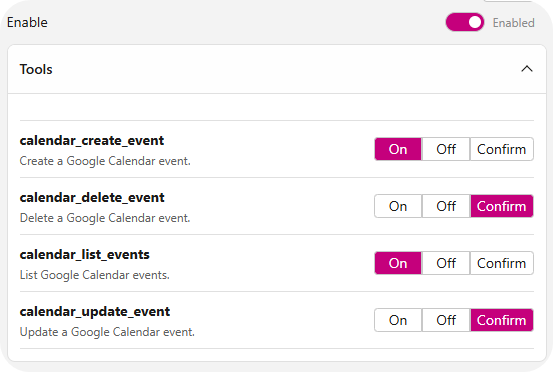
In AI Engineer mode, set each available connector action to On, Confirm, or Off in Settings > Connectors. Operations Manager mode uses Haruno's built-in defaults instead and does not show per-action customization.
- On — allows the action subject to any other applicable safeguards.
- Confirm — always asks before the action runs, including when a chat uses Automatic mode.
- Off — makes the action unavailable to Haruno.
AI Engineer permission modes (Windows)
In AI Engineer mode, choose a starting permission mode in Settings and switch modes in an active chat. These choices affect how Haruno handles tool calls, but they never override an Off rule, an action set to Confirm, or a safety check that requires your decision. Automatic mode is available only when the selected model supports it.

| Mode | What it does | Good for |
|---|---|---|
| Default | Uses Haruno's default policy for a new chat. | Everyday work when you want Haruno's recommended behavior. |
| Accept Edits | Lets file edits proceed without an approval prompt; other tools still follow their configured policy. | Editing a trusted workspace while you review the result. |
| Plan only | Lets Haruno research and propose a plan without carrying out tool actions. | Exploring an approach before allowing changes. |
| Automatic | Lets Haruno proceed where policy allows. Confirm rules and mandatory safety checks can still ask you. | Trusted, well-tested work with appropriate action rules. |
| Bypass | Uses the least-interrupting mode available where product policy permits. Mandatory safety checks can still intervene. | Highly controlled work where you understand the consequences. |
Revoking or changing permissions
You can disconnect a connector or change its permissions at any time from the Connectors settings. If you disconnect an app, Haruno will no longer be able to read from or write to it. Existing task history stays in your workspace unless you delete it.
Best practices
- Only connect apps Haruno actually needs for your tasks.
- Review connected apps regularly, especially after team changes.
- Use workspace-level or role-based access when available.
- Never share your Haruno account credentials with others.